|
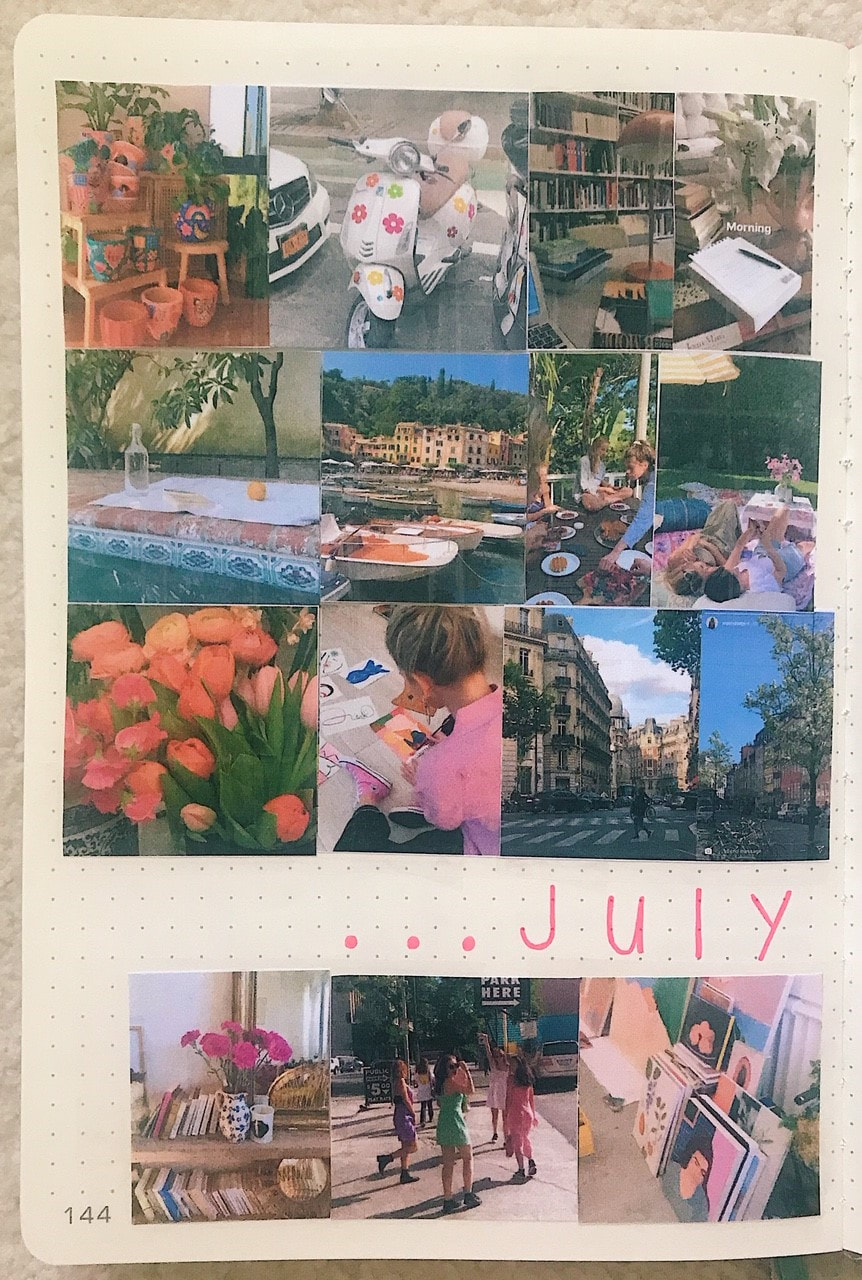
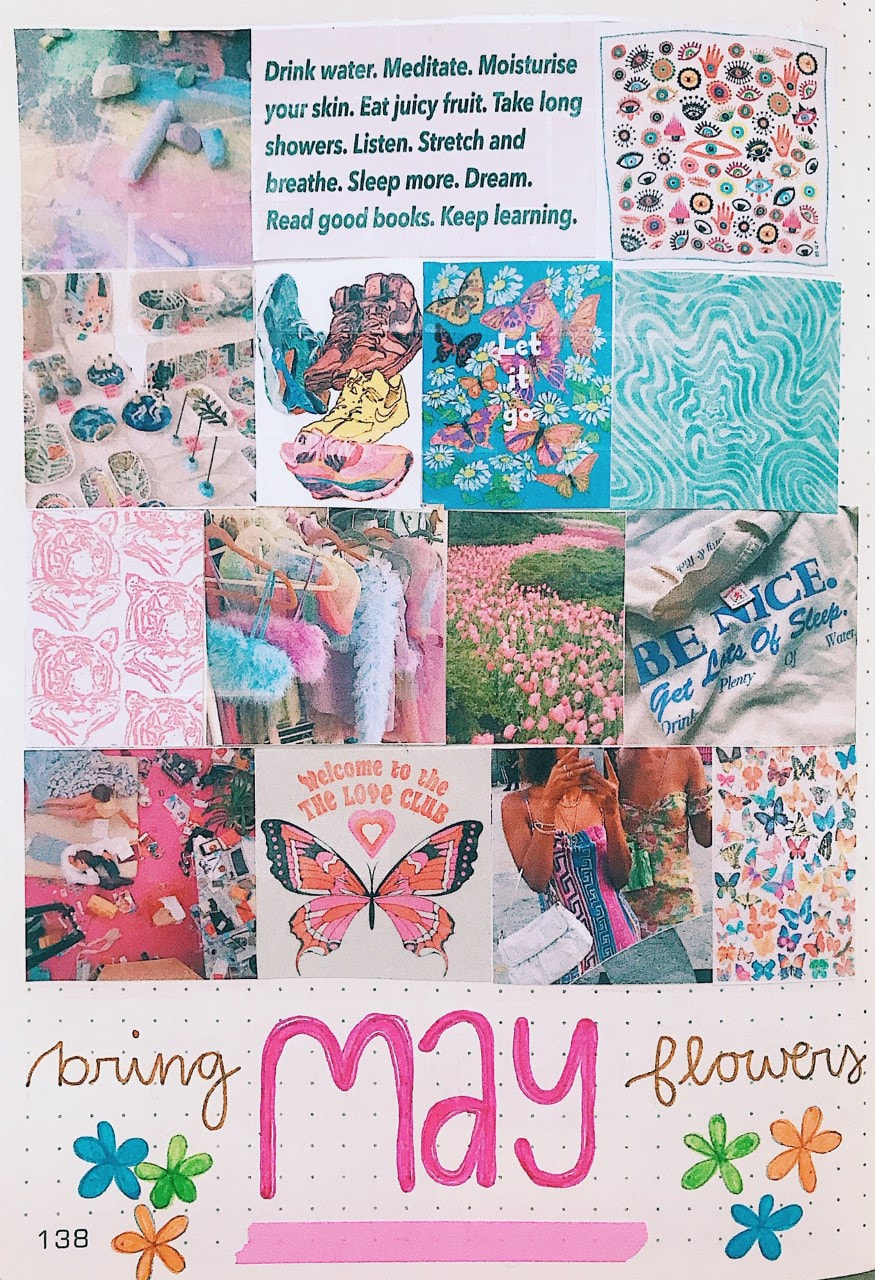
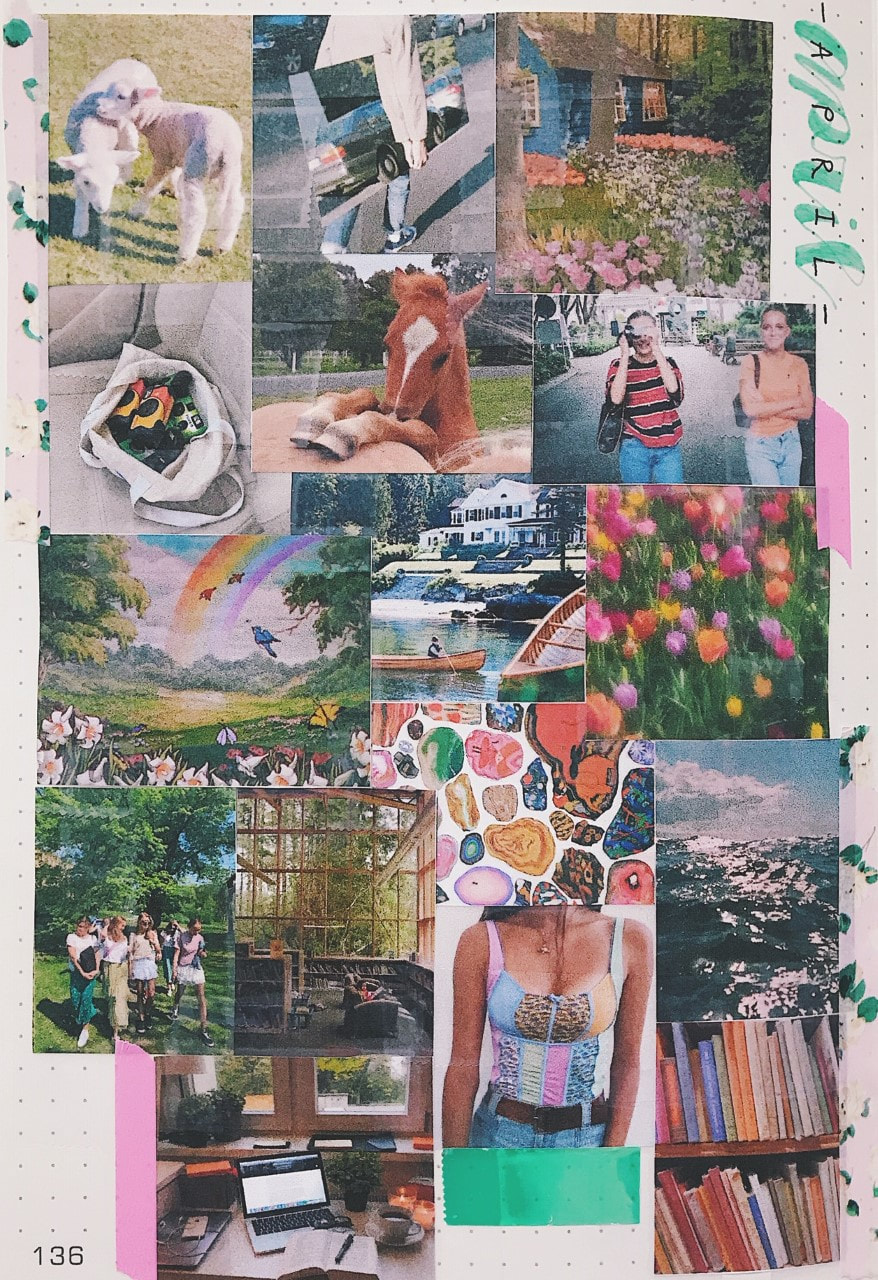
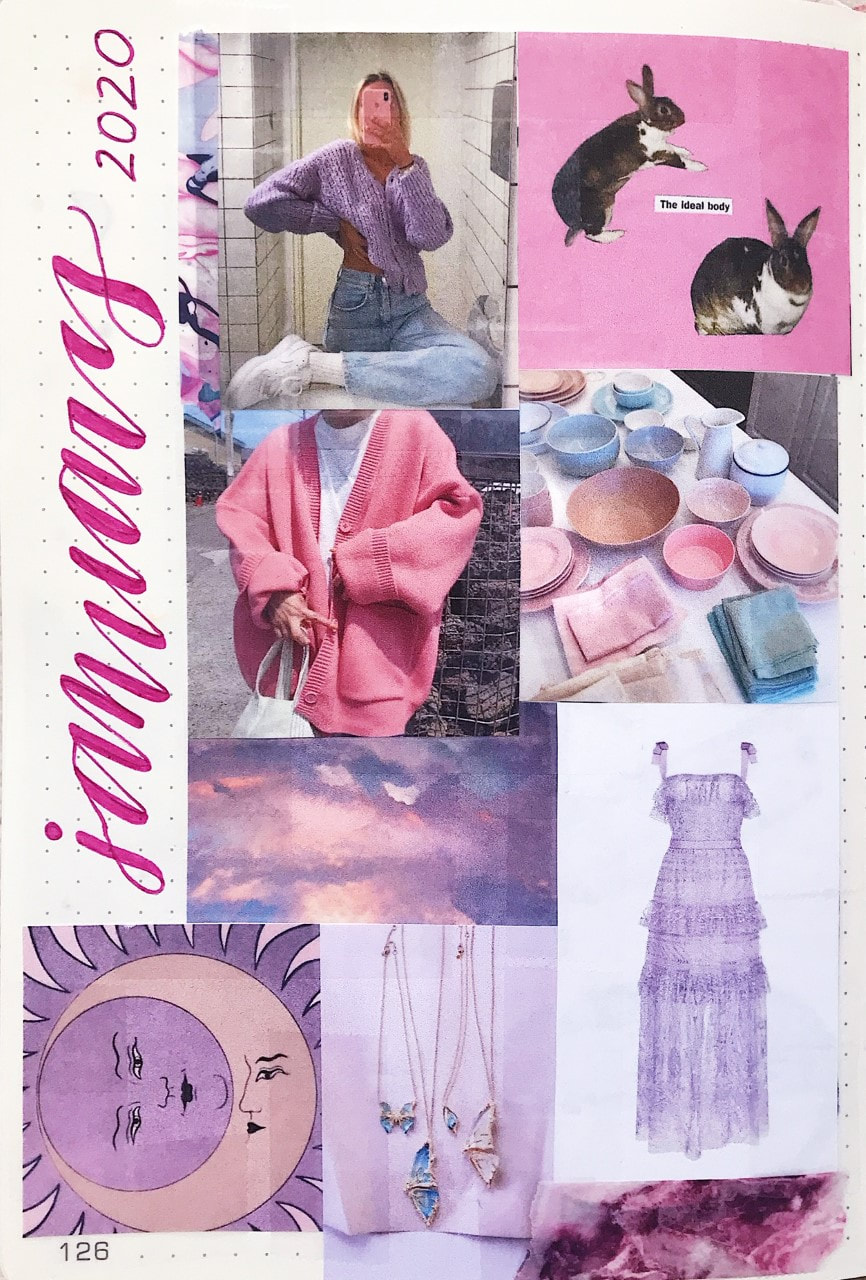
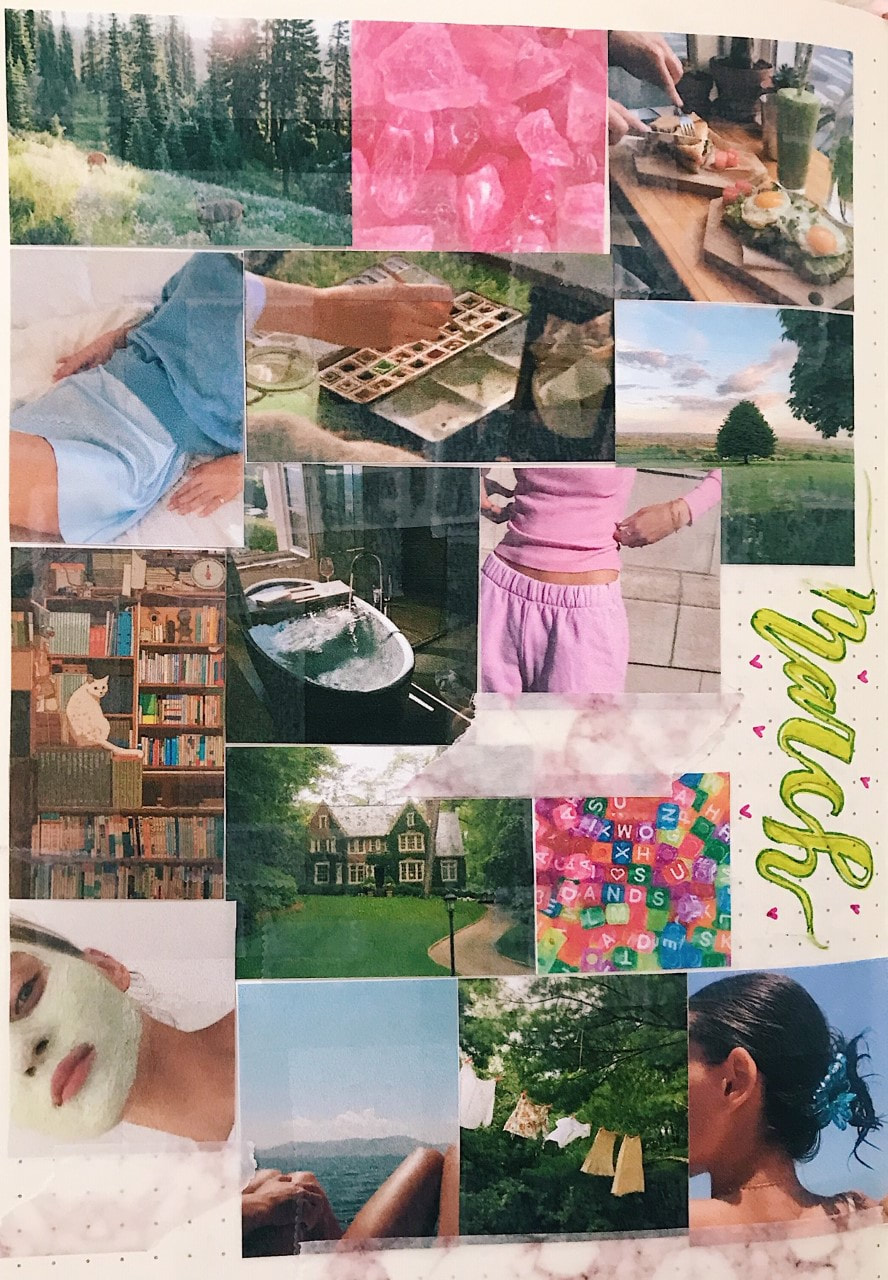
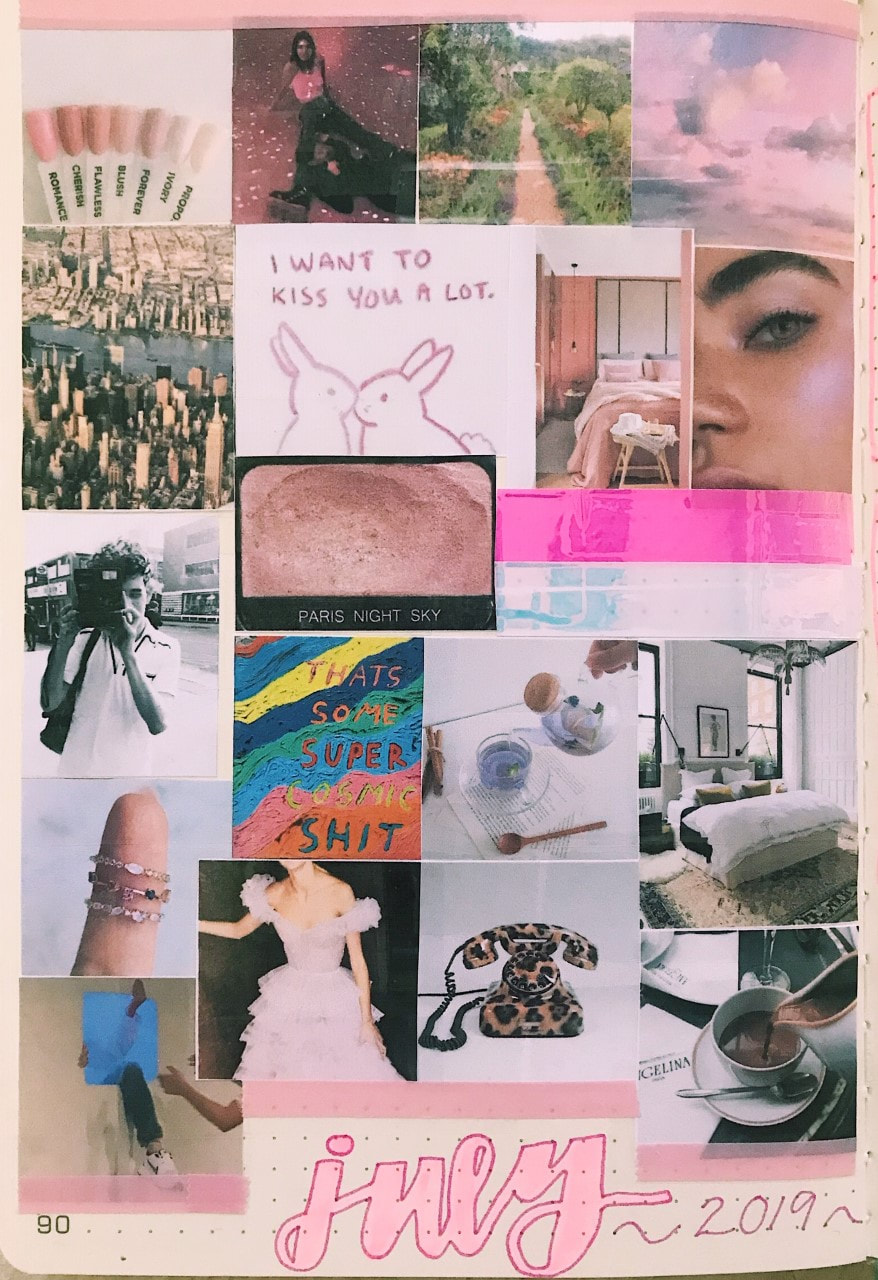
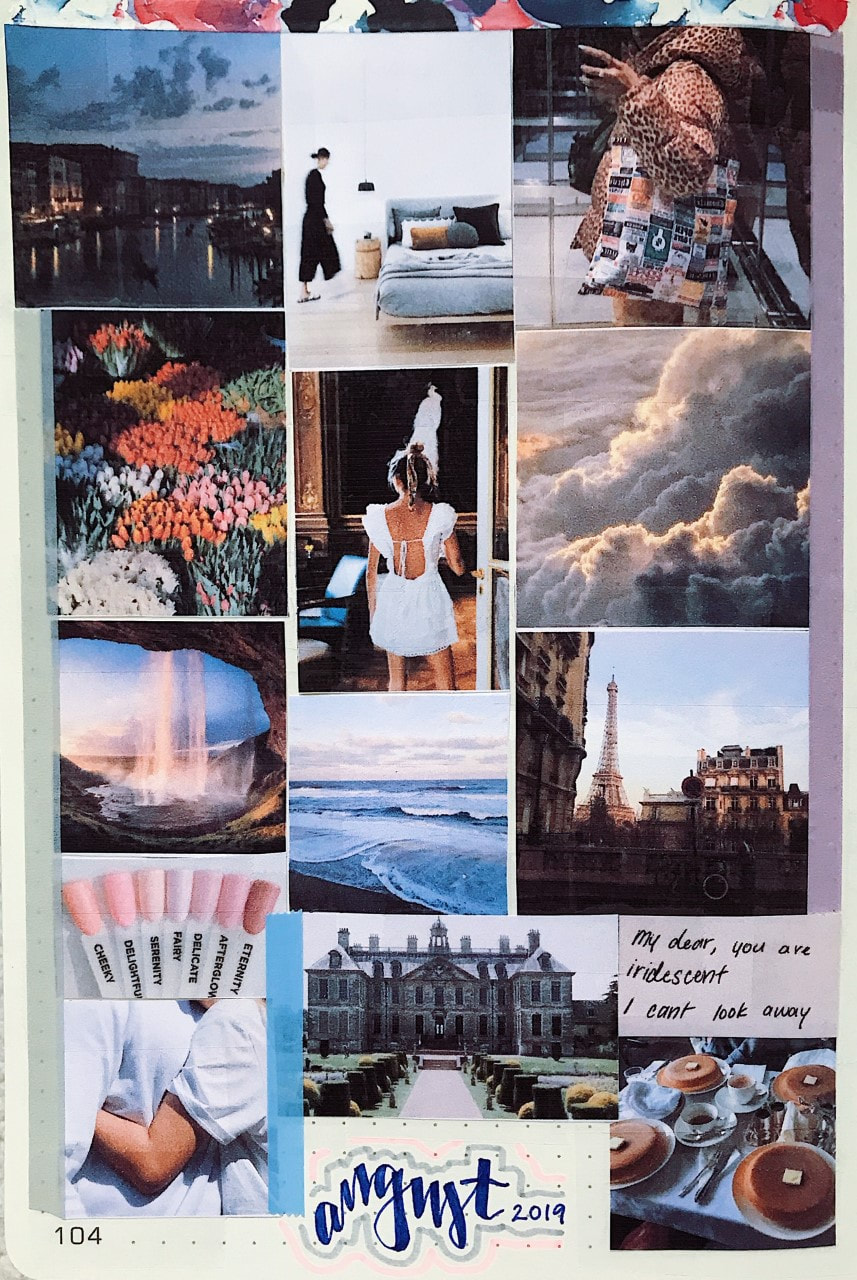
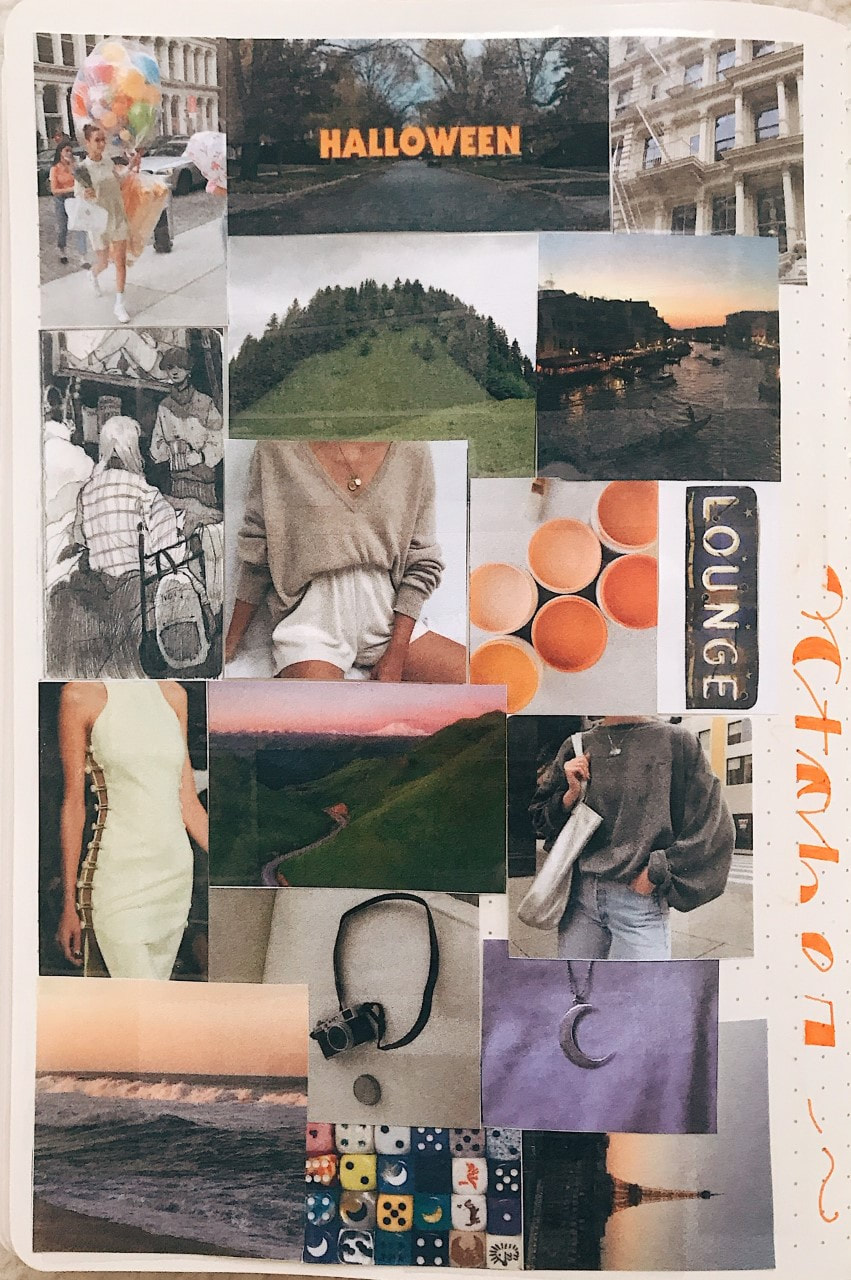
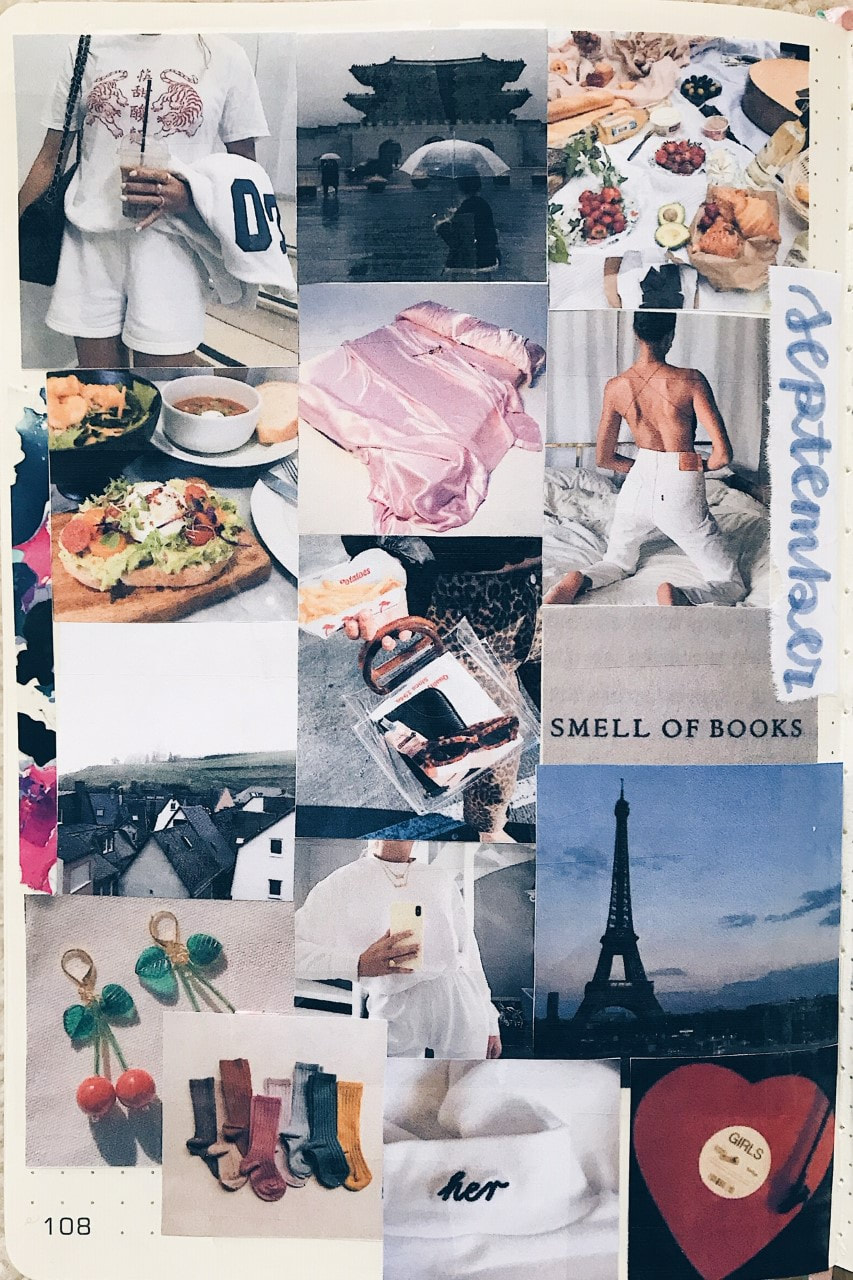
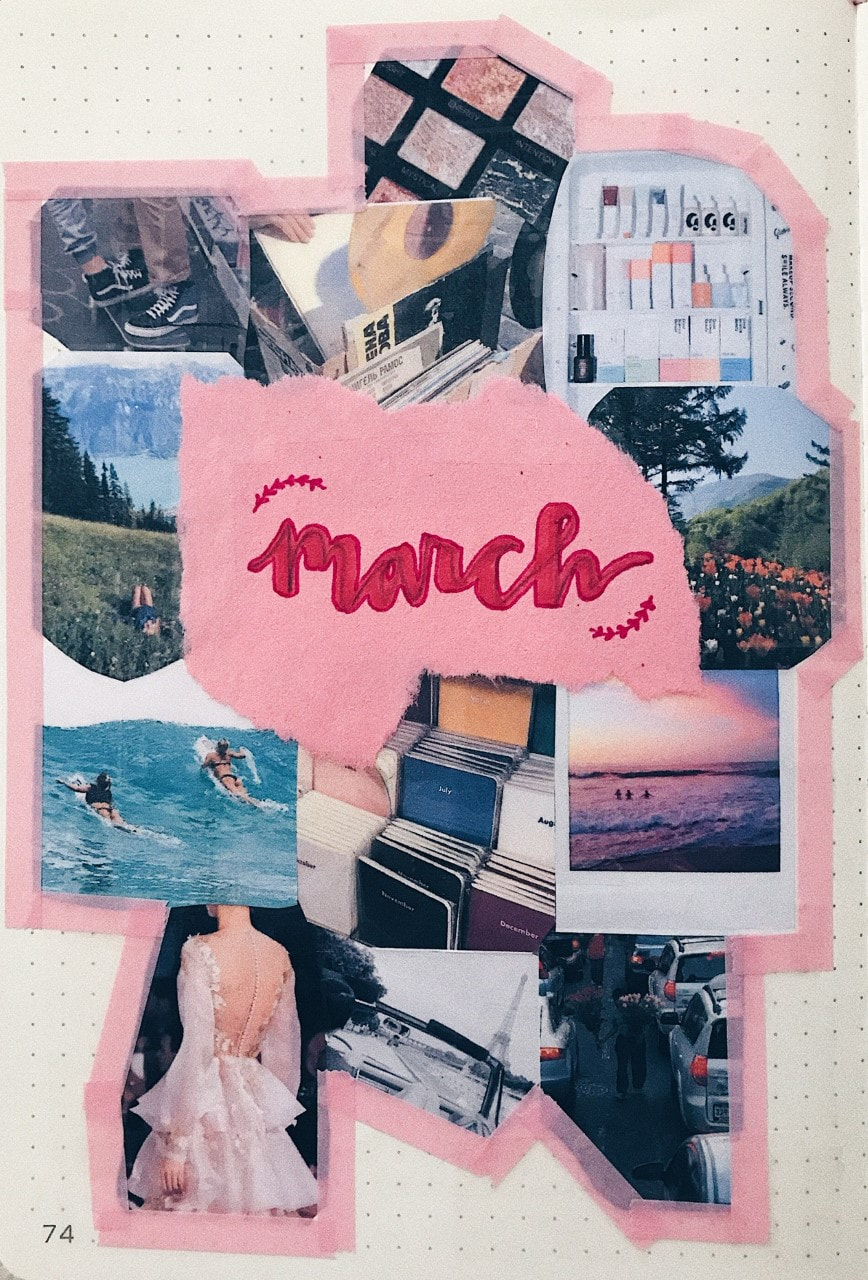
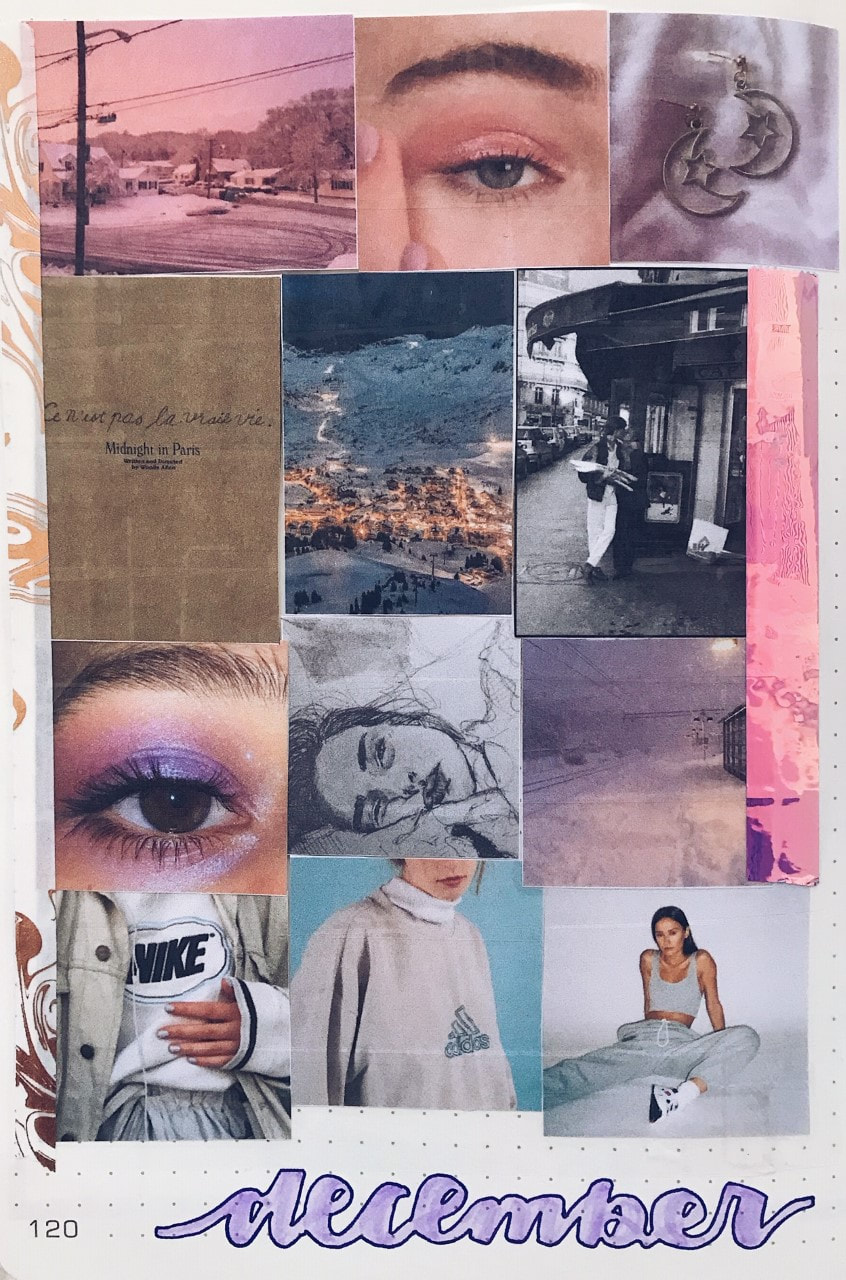
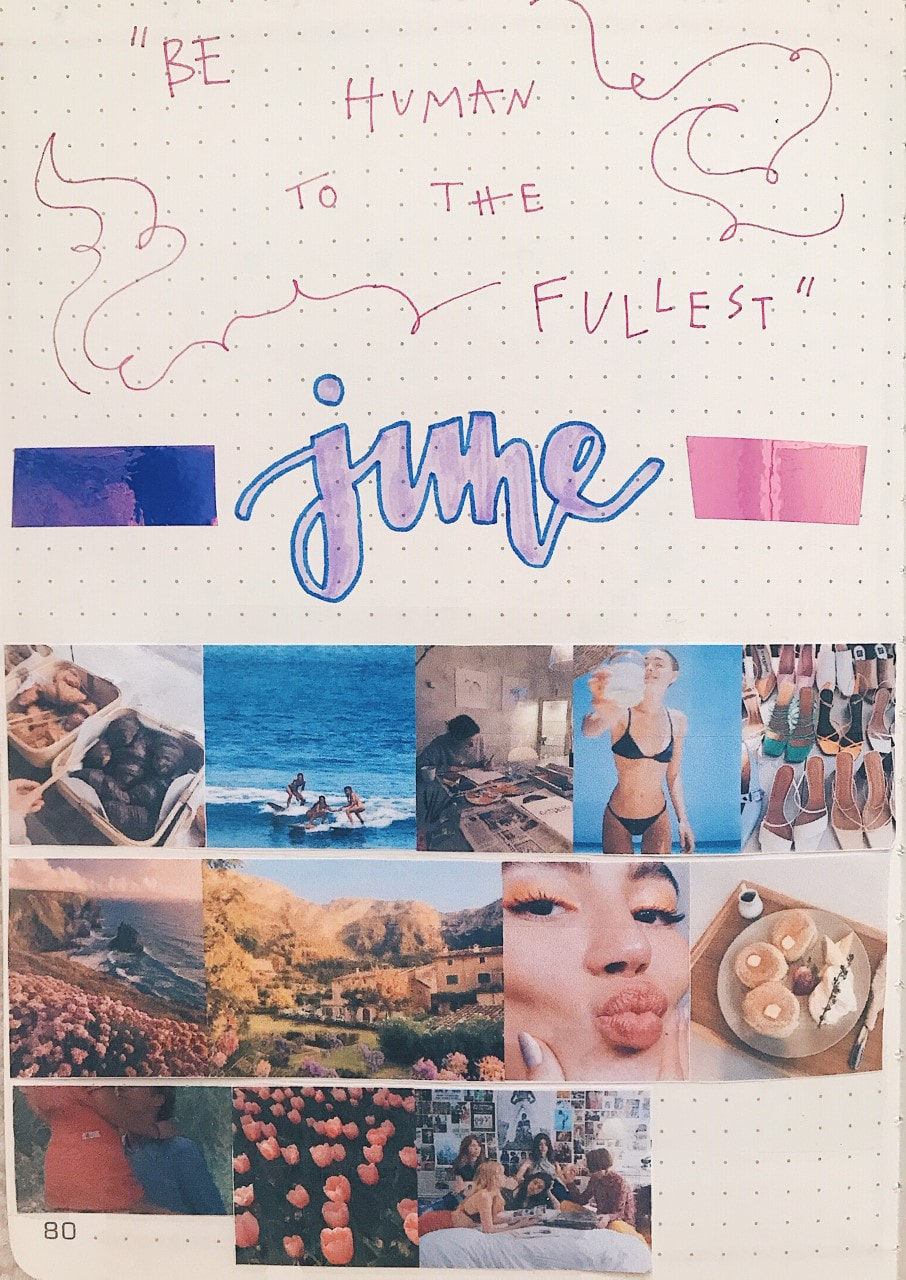
6/28/2020 0 Comments making a monthly mood boardOne of my favorite things to do at the end of each month and in preparation for the newness of the month ahead is to make a mood board collage in my bullet journal to sit adjacent to my calendar. I find great enjoyment in creating a theme and carefully selecting pictures to encompass my current aesthetic. As I love sharing my results on my Instagram stories and VSCO, I am spreading my love for mood boards onto my blog as well, with this post dedicated to the process behind my monthly creations. Although fairly simple, I hope you find inspiration to speak and live your own aesthetic until -- abracadabra! -- so it is created. Also -- I took a break from posting because I did not think it would be appropriate to continue pushing out content considering the current state of our country. One of the quotes that I saw during this period of reflection, education, and growth asked that as we return to "normal," we consider what parts of "normal" we want to return to. So, even though I am posting a new article, an act implying normalcy, please know that I am not aiming to turn a tone-deaf ear to the world. Continue to educate yourself on the facets of the society we live in, whether through the variety of Instagram stories that are posted at your fingertips, or through books, documentaries, and more. Let us all work in whatever way we can to build unity and equality as a community and nation. 1. Explore Your Pins My Pinterest is one of my pride and joys since I love carefully curating my Pins to the exact vibe I want. The images I use for my mood board are always from Pinterest, as it is very much a copy-and-paste process of taking my virtual boards and to make a physical one in my bujo. However, I would recommend narrowing your color scheme down to one range (e.g. warm-tones, cool-tones, rainbow, neon, etc.) or color for a more monochromatic feel. Choosing one tone or color will work enormously in your favor when it comes to creating a board that is cohesive and not too overwhelming. I attached multiple photographs of my mood boards from the past at the bottom of this post, and you will see that many of them are similar color schemes to pull everything together.  2. Make a Word Document Once I have selected a color scheme, I copy and paste the Pins I like as I find them into a Word Document. If you have a standard sized bujo, then filling up one page in Word about three-fourths of the way should be a good amount of pictures to fill one bujo page. Plus, you can easily visualize in a Word Document how the images will blend together once printed. If you want, you can even pre-plan the design by re-arranging the images virtually so you don't have to awkwardly lay out the small paper cutouts like I usually do. :) 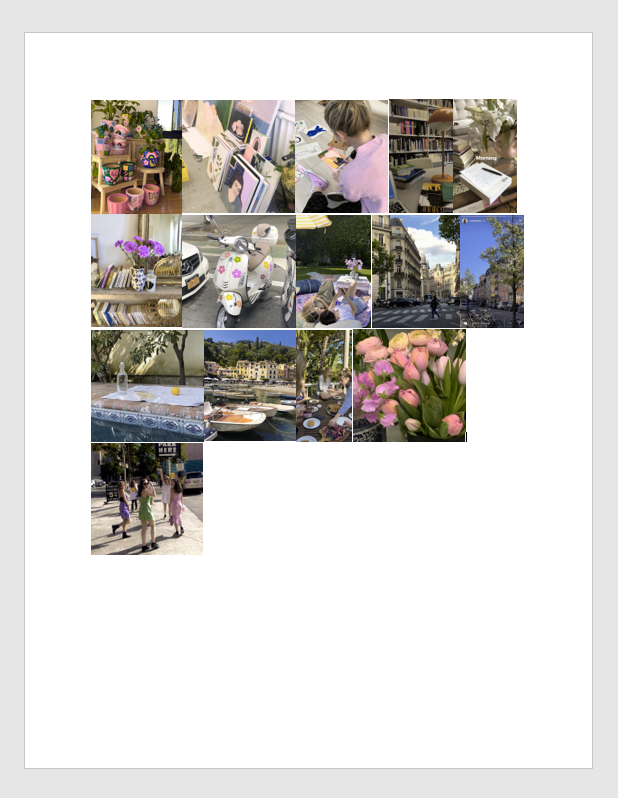 3. Print & Cut Self-explanatory -- after you finish selecting your Pins, it's time to print your Word Document and cut out the individual images! 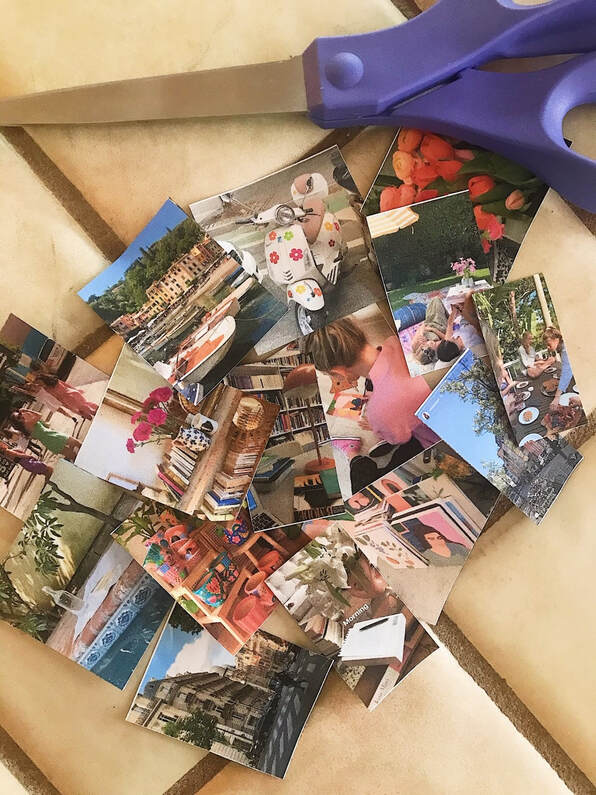 4. Paste Your Images Naturally, your next step is to lay out your images on your bujo page to tape down. Make sure that you leave a space to write the month! I first like using clear tape to ensure the most stable stick. For a glossier finish, I put tape over the entire page so there is no finish difference between the tape on the edges and the matte of the printer paper. Once you've finished using a basic tape, you can add some extra color with the washi tape of your choice. Occasionally, I will find a washi tape that matches my color scheme and add two or three pieces along the border or in any blank gaps. 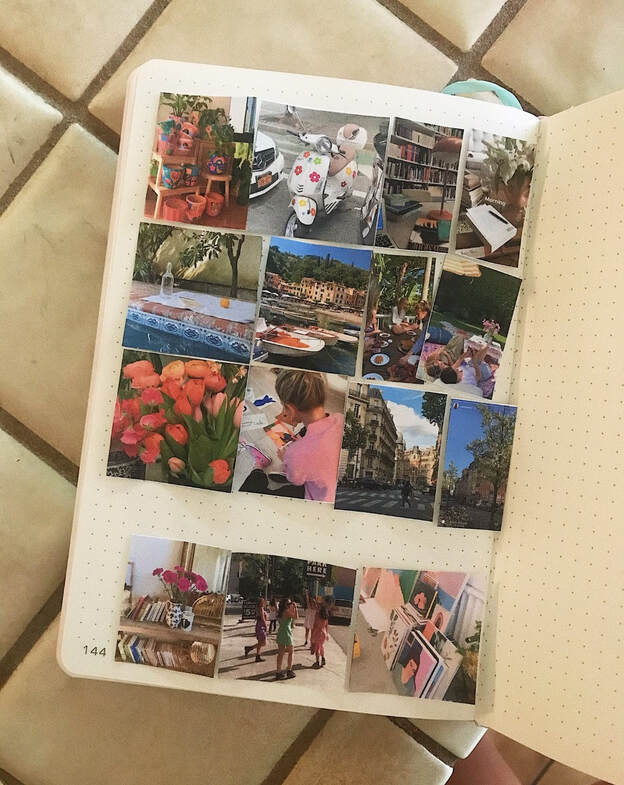 5. Write the Month In the past, I tend to write my month along either edge of my page, on the bottom, or if planned properly, in the middle. For a month in the middle, I like to use construction paper as a backdrop to your handwritten month. You can carefully rip out an oval or circular shape to fill in the center and cover the edges of the printed images while giving off a softer look with torn edges. Also, writing your month in calligraphy will differentiate it from your normal handwriting on the calendar adjacent and add a fancier touch. 6. Draw Your Calendar For functional purposes, my final step is to draw a calendar on the page adjacent, filling it in with each date and any appointments, holidays, or activities I have. For a standard sized bujo, I outline the perimeter of the calendar on the very edge of the page, except for the top, which I draw three lines down from to leave room for labeling the days. Next, I draw a vertical line every four dots to create seven even columns for each day. Lastly, I draw a horizontal line every six dots to create enough even rows to suffice for however many days are in that month. 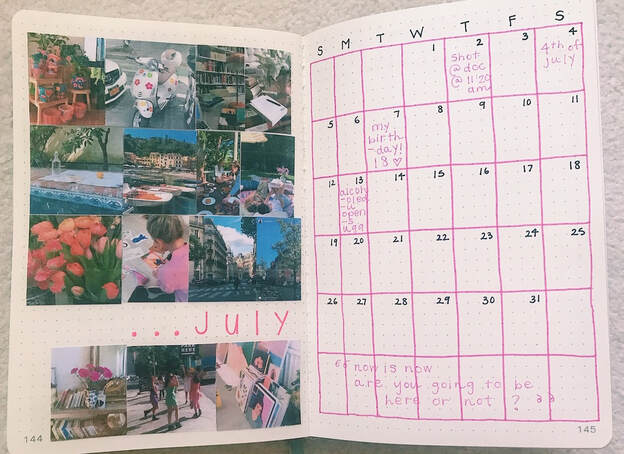 Abracadabra! You have a beautiful and themed monthly mood board spread. I attached a few images below of my recent creations for reference or inspiration. And, the first image is for this upcoming July which I made while writing this article. Wishing you a safe and happy month ahead. :)
0 Comments
Leave a Reply. |